You probably know your shoe size. But how many times have you bought a pair of shoes only to find they’re too narrow, too tight or too loose?
It happens to the best of us.
A study conducted by the American Orthopaedic Foot and Ankle Society found that 88 percent of women in the United States often wear shoes that are too small for their feet.
According to the Wall Street Journal, The College of Podiatry also conducted a study in which one-third of the men and nearly half of the women they surveyed said they had bought shoes that didn’t fit.
So why is everyone walking around wearing shoes that don’t fit?
Feet Change with Age
In the same way wrinkles form and grey hairs appear, feet age as well. Here are a few changes you might experience:
- Feet can actually get bigger over time. Foot arches can drop due to weakened tendons and gravity, causing your feet to lengthen and widen.
- Changes in your toenails can make shoes feel smaller. Toenails can thicken and become misaligned with age.
- You may experience changes in toe position over time. Your gait pattern may change as leg muscles weaken or become stronger, and this will cause your toes to compensate for the difference in weight distribution.
- Stiffness and arthritis will make your feet less flexible, making stiffer shoes feel more uncomfortable and restrictive.
The average shoe size has also expanded a lot over the past 100 years. At the beginning of the 20th Century, the average women’s size was 35 (that’s 4.5 US). Today, it’s size 39. Our average height is increasing due to diets with more vitamins and minerals, which means we’re also getting heavier. Overall, our feet are simply expanding to be able to support the extra weight.
Shoe manufacturers can also be to blame, as fit may vary from one brand to another. This is just an annoying fact of life. Some styles are also less forgiving than others, like shoes with pointed toes.
Or you bought a pair of shoes that were too small because they didn’t have your size, hoping you could break them in…
Wearing the Wrong Size Shoes is Worse Than We Think
One big reason we throw caution to the wind and buy the cute-but-too-tight shoes is because we just don’t know the consequences.
Wearing shoes that don’t fit properly can cause a number of negative health effects: blisters, abrasions, bunions, hammer toes, consistent pain, long-term injury, and even back issues.
Basically, there’s nothing worse than walking around all day in shoes that are pinching your toes. It’s distracting, painful and can cause permanent damage.
The best way to avoid buying shoes that don’t fit is to simply measure your feet before you make your purchase.
How to Measure Your Feet with a Brannock Device
One easy way to measure your feet is with a Brannock Device. This device measures the length and width of your foot, as well as your arch length. You have probably seen these kicking around at shoe stores.
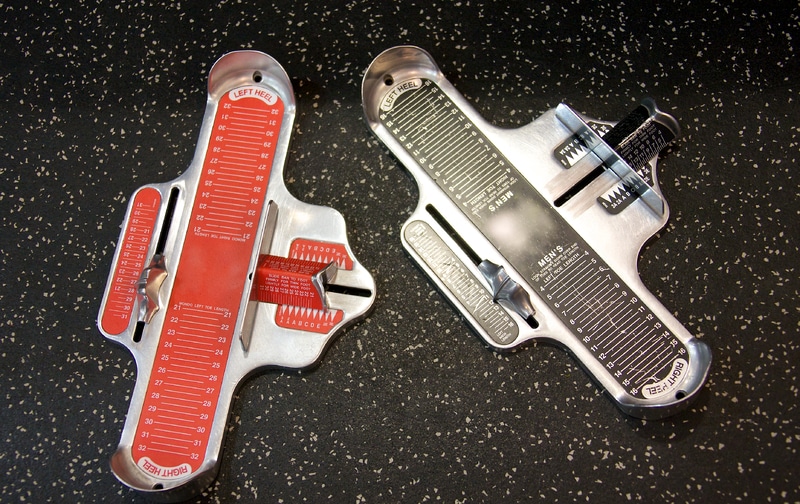
Step 1: Understand Heel to Ball Length
It is important to know the overall length of your foot. But, you should also know your ball length – how far it is from your heel to the ball of your foot.
Shoes are designed to bend at the ball of the foot. If your foot and your shoe aren’t bending at the same place, your arch won’t be properly supported. This can cause strained feet and even plantar fasciitis (a painful condition that causes a stabbing pain in your heel). So, people with long toes will need different shoe sizes than people with short toes, even if the overall length of their feet is the same.
The Brannock Device takes your heel-to-ball measurement into consideration.
Step Two: Setting the Brannock Device Up for Measuring
Set the Brannock Device to its widest setting. Make sure you are wearing the socks you would normally wear in the pair of shoes you thinking about purchasing. Slide the arch indicator all the way back. Place your foot on the device with your weight equally distributed over both your feet. Slide your foot all the way back on the device so it’s against the heel cup.
Step Three: Measure the First Foot
There are three measurements you should take with the Brannock Device:
Heel to Toe Length: Press your foot flat against the device, and look straight down over your longest toe. The number that lines up with your biggest toe is your Heel to Toe length. This is just one measurement you should use in determining your shoe size, so don’t skip the next two steps.
Heel to Ball Length: Move the little pointer on the side of the device up until the inside curve matches up with the ball joint of your foot. The he lower middle rib should be directly beside the ball joint. Between your heel to toe length and your heel to ball length, the larger size is your correct shoe size.
Foot Width: Slide the width bar right to the edge of your foot. Find your shoe size on the bar and then check the width measurement that corresponds with that size.
Step Four: Measure Your Other Foot
It’s very common to have different sized feet. One foot can be a whole size bigger or smaller than the other, which can make a big difference when shopping for shoes.
If this is the case, choose the bigger size. The shoe on your smaller foot will be a bit loose, but it’s better than having one shoe that’s too tight. You can always your tie laces a bit tighter on the smaller side. You can also get a half insole or a small pad to put in the heel of your shoe to stop your ankle from slipping.
How to Measure Your Feet the DIY Way
If you’re thinking about buying a pair of shoes online, you probably don’t have access to a Brannock Device. You can get similar results at home, as long as you have paper, a pencil, and a ruler or tape measure.
Just keep in mind, you won’t be able to measure your heel to ball length, so this measurement won’t be as accurate. However, it should be sufficient for finding your size.
Step One: Trace Your Feet
Find a piece of paper – you can use paper from your printer or simply rip a page out of a notebook. Stand with your weight evenly distributed across both feet, with one foot on the piece of paper. Make sure you’re on a truly flat surface with no bumps or ridges under your foot. It is also much easier to measure your feet on a hard floor, rather than carpet.
You can wear the socks you would normally wear with shoes, or if you don’t plan on wearing socks, measure your bare feet. Regardless, do not wear any shoes.
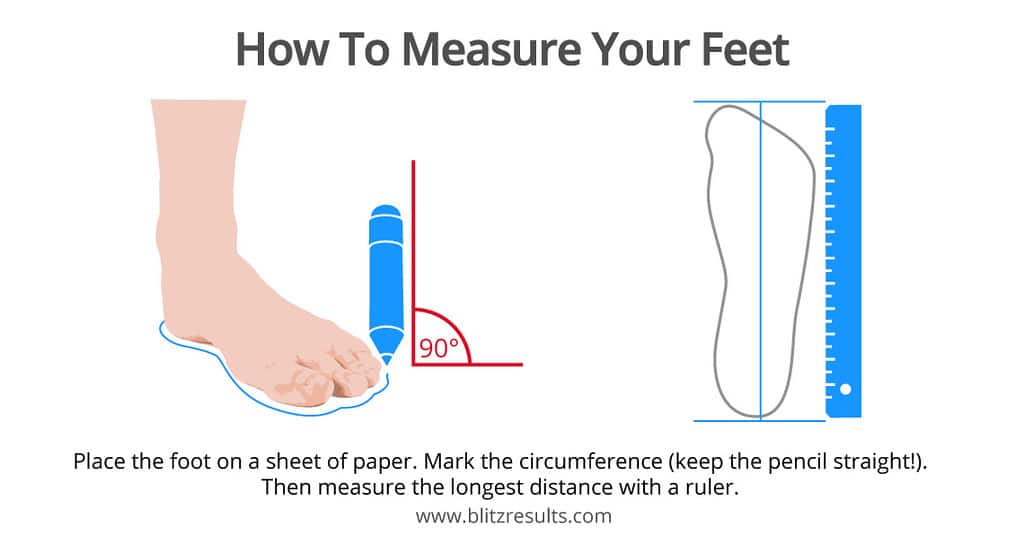
Bend down, and trace around your foot with the pencil at a 90 degree angle to the paper. Make sure the pencil is not angled toward or away from your foot. This will affect the tracing, making your foot measurement smaller or larger than your foot actually is.
If you can’t reach all the way down, get a friend or family member to trace your foot for you. You can also sit on a chair or crouch down if this helps you reach your foot. Just make sure your weight is evenly balanced across both feet.
Step Two: Measure
Make a mark on the paper in the middle of your heel and the tip of your longest toe. Use a ruler or tape measure and find the distance between these two marks. Subtract 0.25 inches from this number to account for the diameter of the pencil. This is the overall length of your foot.
Next, find the widest points on each side of your foot, and mark each point. Measure the distance between these two points. Again, subtract 0.25 inches from this number to account for the pencil. This is the width of your foot.
Step Three: Repeat on the Opposite Foot
Repeat the measuring process for your other foot.
Once you’ve recorded the measurements of both of your feet, you’re ready to figure out what shoe size you are. If your feet are different lengths and widths, always use the largest measurements when determining your size.
Use the shoe size chart on the website you are looking to buy your shoes from. Sizing varies between countries, and men and women’s sizing is also different.
How Your Shoes Should Fit
Before buying a pair of shoes, it’s important to consider what you’ll be using them for. Some shoes should fit a little tighter or looser depending on the activity you plan on doing in them.
Dress Shoes
Dress shoes should be comfortable enough to wear for a full day of office work or a nice dinner out, but you won’t necessarily need to walk all day in them. So, you don’t need too much extra space in the toe, and they can fit snugly through the middle of your foot.
One easy way to tell if your dress shoes fit properly is if they’re creasing right before the toe area starts to narrow. If they’re creasing over your toes, this indicates your foot is not bending where it’s supposed to in the shoe.
If the sizes of your feet are rubbing against the shoe, they may be too narrow, but they also might not be long enough. Your shoes should be the right width if the eyelet wings (where the laces loop through) run parallel to each other. They shouldn’t touch at the top when your shoes are tied.

Cleats
You want your cleats to fit snugly. Your toes should be able to move, but there shouldn’t be more than a quarter inch between your longest toe and the front of the cleat. These shoes are designed to form to the shape of your foot. Your heel shouldn’t slip when you walk. They might be a little uncomfortable the first few times you wear them, but a good quality pair will mold to your feet.
Athletic Shoes
Walking shoes: You typically want lots of room in the toe area of your walking shoes. Feet can swell a bit while walking, and you don’t want your foot muscles to be restricted at any point while wearing walking shoes. There should be about half an inch between your longest toe and the front of the shoe.
Running shoes: Your running shoes should feel snug around the forefoot and a bit looser in the toes. Your arch should also feel supported. If the arch support in the shoe is digging into your foot, you need a different size.
Boots
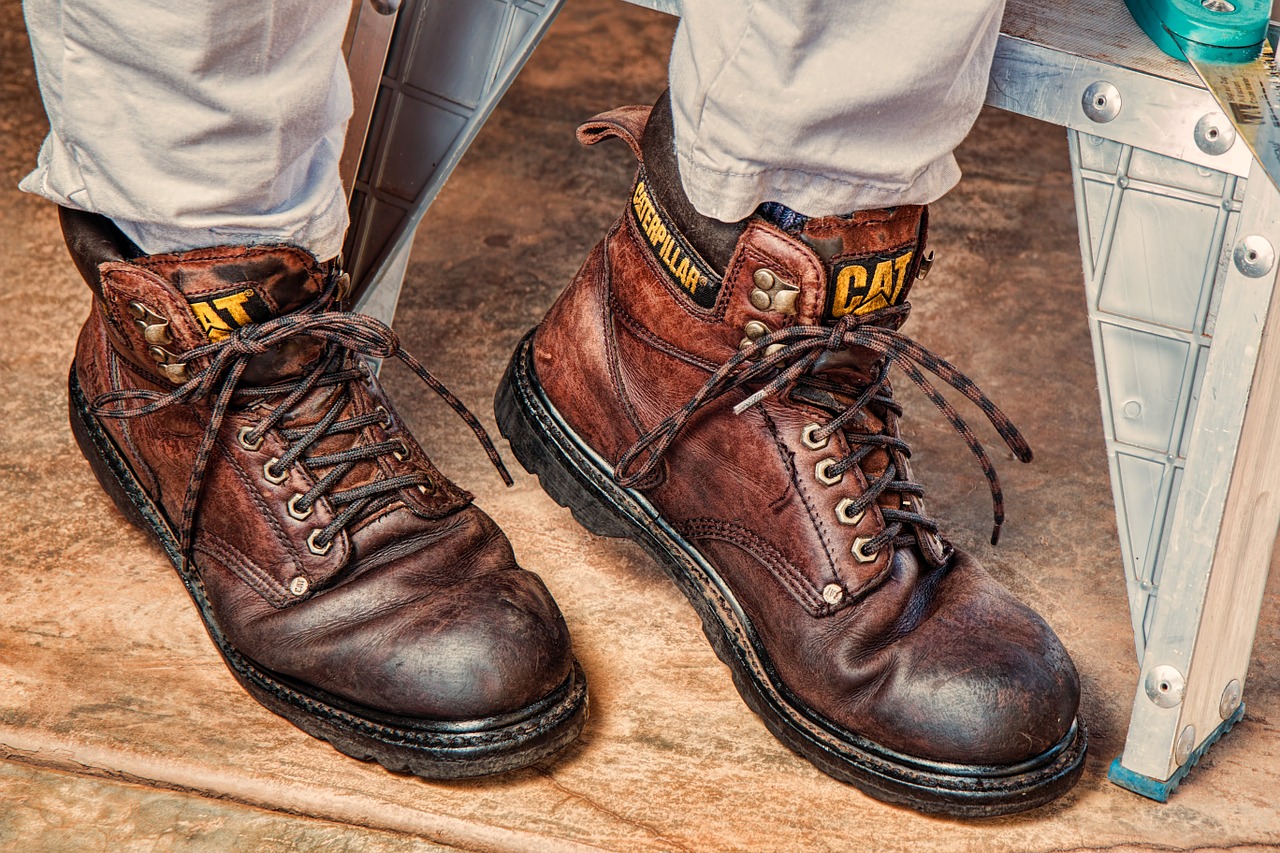
Hiking or Work Boots: If you’re buying a pair of boots for hiking or working in, make sure they’re not too wide and that your heel doesn’t move up and down inside the boot. You will want a bit of extra room in the toe box because your feet tend to slide forward slightly while walking downhill.
These types of boots are often worn for hours at a time, so you might want to buy a half size larger than normal if you want to put custom orthotics or thicker insoles in them for extra comfort.
Wading boots: You might want to go up one size from your regular size in wading boots to accommodate your waders. Sometimes manufacturers will factor this into their sizing, so make sure to check the sizing for the brand you’re considering before you buy.
Rain boots: Because rain boots tend to be tall, it’s important to consider your calf circumference when purchasing them. Most rain boot manufacturers will give you the circumference of the boot opening. You shouldn’t need to size up though, and if your foot is flopping around a lot, your boots are probably too big.
Winter boots: When buying a pair of winter boots, it’s important to consider how thick the socks you will wear with them are. You might need to go up a full shoe size, but you should also check that the manufacturer hasn’t accounted for thicker socks in their sizing.
Winter boots also tend to be wide, so if you have very narrow feet you should keep this in mind.
Hunting boots: Like winter boots, consider whether you want to wear a thicker pair of socks with your hunting boots. If you plan on adding a liner to your boots, you might need to go up a size or two.
Lacing Techniques
If you’ve measured your feet, researched the best style for your needs, gone for a fitting, and your shoes are still rubbing or slipping, consider the way they are laced up. Lacing can have a surprisingly big impact on how your shoes feel as you walk.
If you have:
High arches: This pattern will help with stiffness and add comfort. If you have high arches, you might feel like your feet are rubbing on the top of your shoe.
First, lace the shoe in a criss-cross pattern through the first set of eyelets. Then, thread the shoelaces up through the sides into the next eyelets. Then continue the pattern in the same criss-cross pattern as usual. This should leave a gap over the arch area.
Shoes that feel too tight: The best thing to do with shoes that feel too tight is to make sure your laces are done up evenly to decrease pressure. First, thread the laces up without criss-crossing. Feed them through every other eyelet, then across, so that the laces don’t overlap in the center. The laces should look like a ladder.
Slipping heels: This pattern gives the ankle more support while ensuring your shoes aren’t too tight. Lace the shoes in a criss-cross pattern until the second-to-last hole. From here, thread the laces straight up into the last hole, without crossing them over. Tie your shoe as usual.
Black Toenail, Toe Pain & Ingrown Toenails: This pattern lifts the front of your shoe to give your toes more space. Use one half of the lace to thread through all of the eyelets in a criss-cross pattern. Thread the other side of the shoelace from the bottom diagonally to the other side of the shoe, and thread through the top eyelet. Tie your shoe as usual.
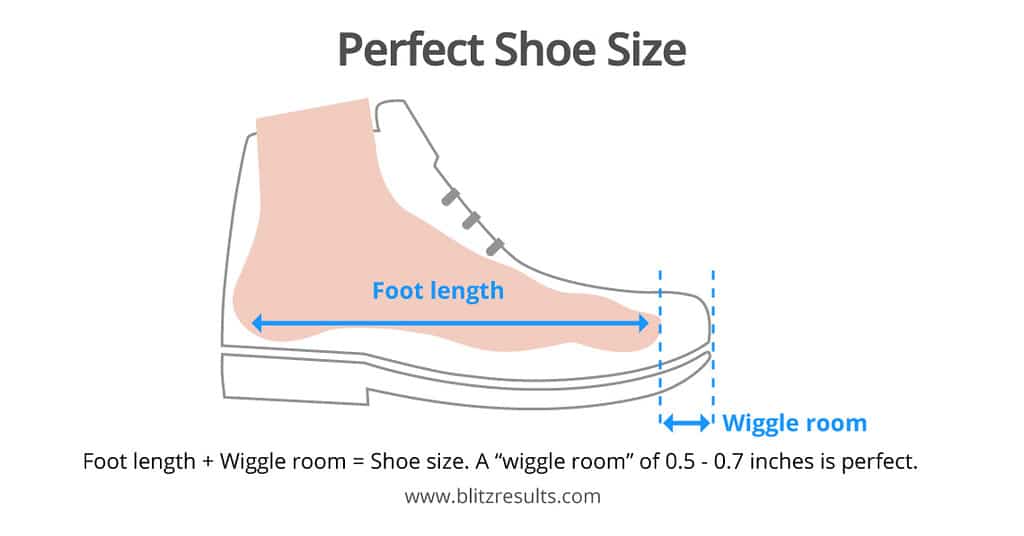
Even though measuring your feet can give you a good idea of your shoe size, all shoes are made differently. It’s a good idea to try a pair of shoes on before you buy them. If possible, take a walk around the store or your home (if you bought them online) before wearing them out and about – if they don’t fit properly, exchange them for a different size or style.
Now that you know how to measure your feet and find the shoe that fits you best, you can say goodbye to foot pain and pinched toes, and buy shoes with confidence!
Related Articles:
